Yatta Checkout User Guide
Add your product
You can add and manage your products on the Products page.
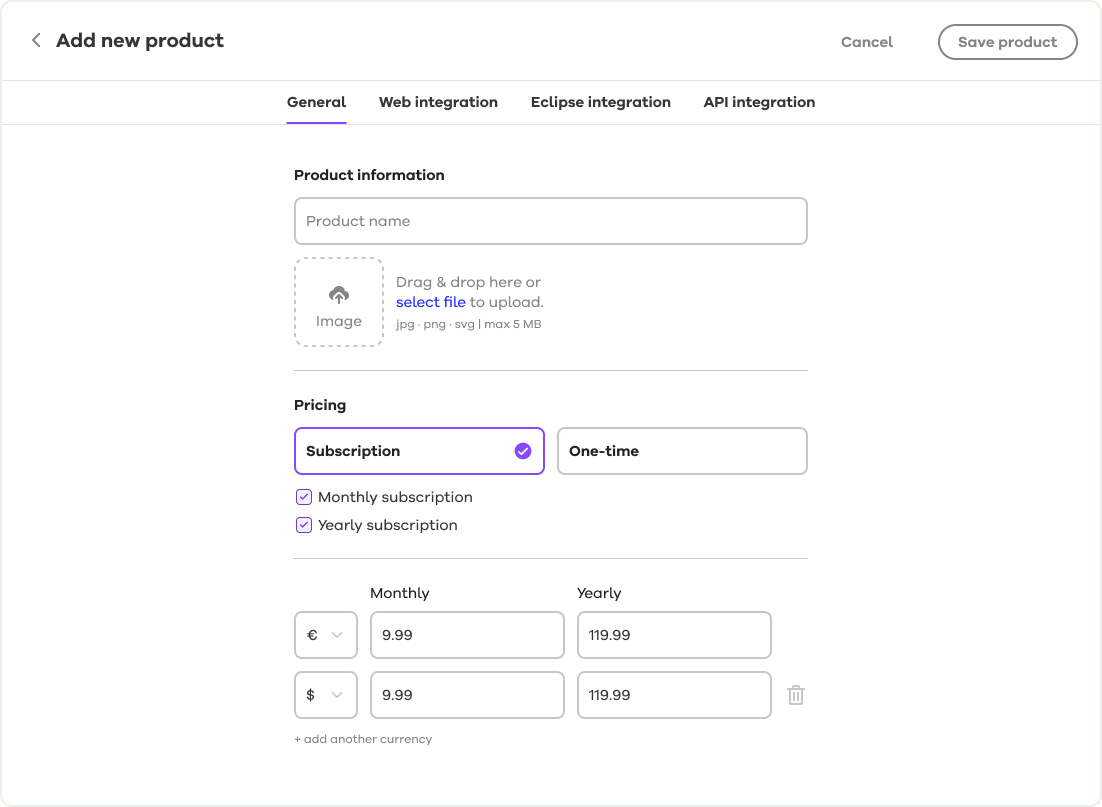
Product information
Product name
The name of your product. This will appear on invoices.
Image
This is for your product's icon or logo — a .jpg, .png or .svg smaller than 5 MB.
Pricing
Toggle between one-time purchase and subscription license types.
Note: Once you have created a product, you cannot change the license type (subscription or one-time purchase). However, you can contact us (checkout@yatta.de) to change it for you.
With subscriptions, you can choose to offer monthly, yearly, or both as subscription period options for your users.
Pricing and currencies
Select the currencies you want to support when selling your product and add the price for each subscription period.
Save
Once you're done, save your product.
Integration
After saving your product you can access your API Keys in the integration tabs for testing.
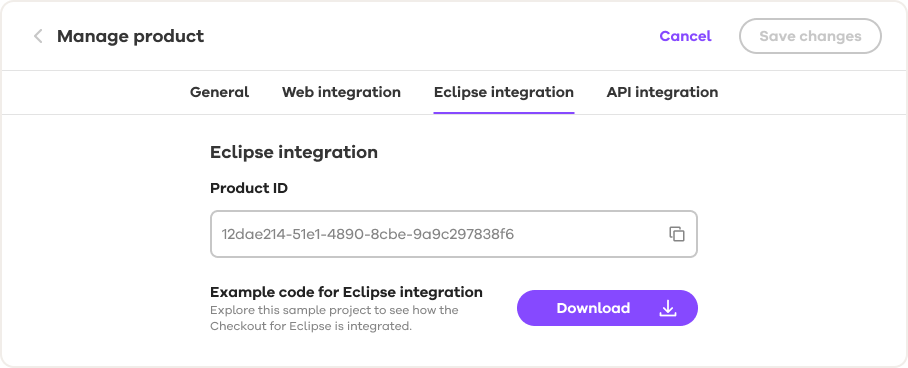
Product ID
This is the API key used to implement the web and in-app Checkout.
Code example for web integration
This code shows a basic example of how to integrate the Checkout into your website. For the implementation details, see Preview Yatta Checkout on your website.
Example code for Eclipse integration
You can download the source code for an Eclipse in-app Checkout demo. For the implementation details, see Preview Yatta Checkout in Eclipse (in-app).