Yatta Checkout User Guide
Preview Yatta Checkout in Eclipse (in-app)
You can implement Yatta Checkout in Eclipse using the following steps:
If you haven't already, set up a product.
Edit the product you would like to implement.
In the “Integration details" section, you can download the Checkout demo's source code.
Import the source code into an Eclipse IDE with Maven. We suggest using an Eclipse IDE for RCP and RAP Developers.
Open >
Right click on one project and run > > > .
Open the file.
Copy the API Key from the "Integration details" section in the portal. If your product's license type is...
Subscription, paste the API Key into the constant
One-time purchase, paste the API Key into the constant
Update dependencies of the run configuration: Right click on file > > > > > >
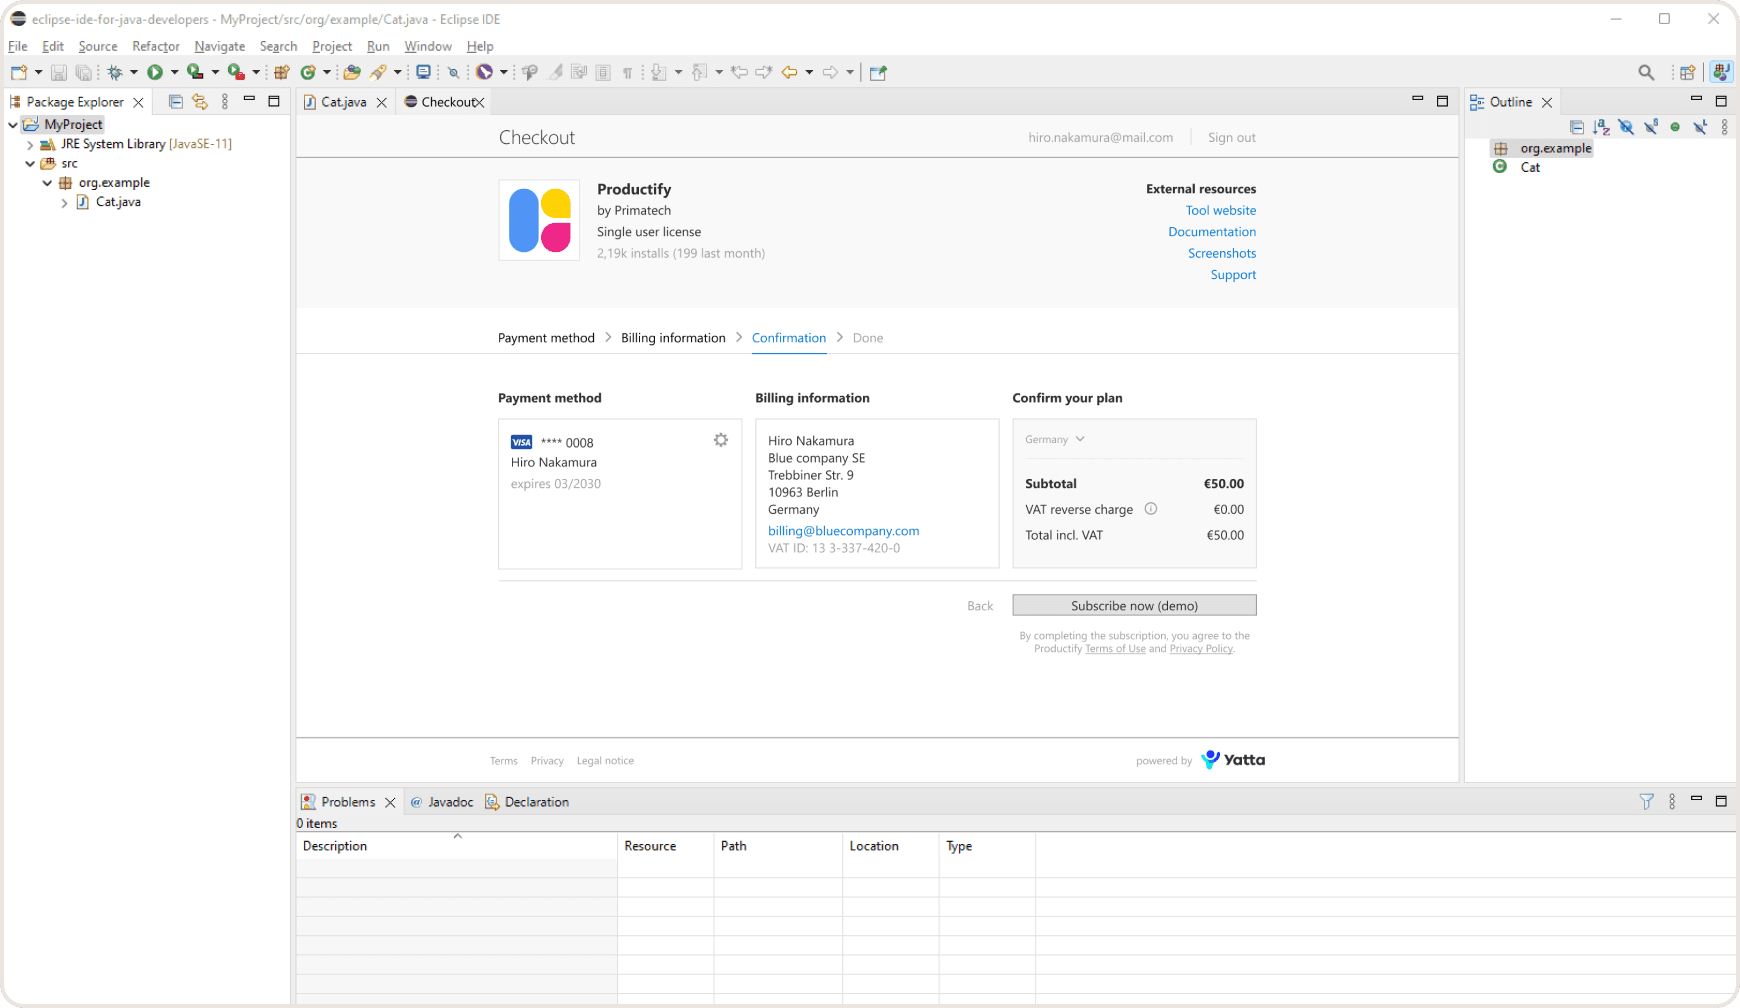
An Eclipse instance with the demo is started. The welcome page explains how to use the Checkout. You can make demo purchases using the provided demo payment and billing data. No real transactions take place.
Note: No emails are sent for demo purchases, but you can download the demo invoice directly on the purchase confirmation page to see how it looks.
You can reset the demo and any purchased licenses via the banner at the bottom of the screen in the demo plugin. Alternatively, you can cancel the demo subscription or delete the demo purchase by going to Subscriptions or Orders in "My Account" respectively.
See Yatta Checkout's complete integration guide for additional features, such as event handlers and license management for Eclipse.